Archives for posts with tag: old chairs

IMG_1096

IMG_1109

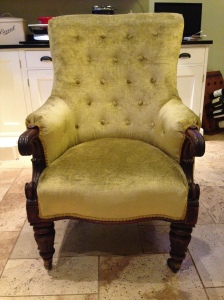
I’ve been so busy over the last six months that I haven’t had time to post any of my work on my blog.  I’ve finally got a spare moment to show you my latest project.  This buttoned back chair had been in the client’s family for a long time and needed some TLC as the sprung seat was falling out the base.


I re-webbed the seat, re-sprung it and re-stuffed it.  With new fabric and trim, and shallow buttoning (like it was before) I was really pleased with the end result – it definitely now has a lease of new life !

Before

Before

‘   I must admit this is a project that I was rather reluctant to take on, as I’d heard ‘egg’ chairs are difficult to reupholster.  However a friend of mine had been badgering me for a while to   have  a go at recovering it.   The chairs are made of polystyrene with a small square base being the only place to attach the material to.  The dog had had a good chew on one of the arms, so it needed repairing too.

I patched the arm with a bit of polystyrene from a local craft shop, and had a new foam seat made up.  The most challenging part was getting the concave shape right.  When making the cushion for the back of the chair, I found I needed to make the front of the cushion smaller than the back, to get in to curve nicely.

Anyway I’m pretty pleaseed with the end result.  Another friend had seen the chair in it’s original state and had commented that she didn’t think it was worth saving, however even she admitted it looked great now that it had been updated!

After

After

Before

Before

After

After

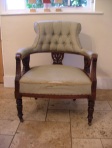
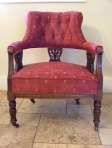
I have just reupholstered this lovely little chair.  My client bought it at auction.  The pale green fabric was faded and torn, but the rest of the chair was in good condition.  When I stripped it, I found that the back was stuffed with some kind of straw which fell apart, so I ended up restuffing the back with horsehair.  Previously the chair was finished with a number of different trims – two types or braid plus studs at the front.  This all looked a bit fussy, so we decided to use piping made out of the same red top fabric and then kept the studs at the front of the chair.  I’m really pleased with how the chair turned out, as I must admit, deep buttoning sends me a bit crazy.  I’m a bit of a perfectionist so I’m never happy with the positioning of buttons and end up redoing them far too many times !

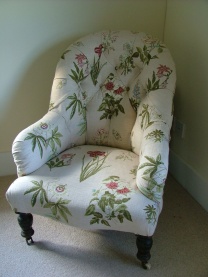
This chair was the final piece I learnt to reupholster at my local Adult Education centre. Having a curved iron frame instead of a wooden frame, made it quite a different kind of project to work on. To begin with, all the iron work had to be wrapped in hessian, this gives you some thing to secure the various layers to later on. It required an awful lot of horsehair for it’s stuffing and really was quite a time consuming project.

The plan had been to get it to it’s calico stage and then put it up for sale on my website, so that the buyer could choose a fabric for it to be upholstered in. However I was impatient and wanted to see the project finished. I set out to find a neutral fabric, so that it would be easy to sell, however I couldn’t bring myself to cover it in something uninspiring, and so opted for this beautiful botanical print from Fired Earth. I was a little worried that it won’t work well with the buttoning on the back of the chair, but in actual fact, the random pattern worked well and I was delighted with the end result.

Half tempted to keep this chair, I was quite disappointed when a buyer came along and loved the fabric I’d covered it in and wanted the chair.

This tub chair that somebody brought to me, looked like it had seen better days but was still very comfortable to sit in.

When stripped back I discovered that the wooden frame was surrounded by a metal frame in an octagonal shape.  This made it a little tricky to upholster as there wasn’t a lot of wood to bang tacks into.

All the stuffing around the back and the base of the chair needed replacing, but the seat and the inside back were fine.

My client had chosen a really bold red faabric with a large flower design.  This really did give the chair an amazing facelift.

I covered the seat first and then the inside of the back.  The fabric was folded into pleats to give the back it’s shape. The back ot the chair back went on next and then piping was attached to the bottom panel which was wrapped around the whole of the base of the chair.

Wow !  What a transformation !

I was recently asked to be a mentor for a student from a local school, who was doing an interior design project.  As part of her project she was keen to learn some basic upholstery techniques.  We decided to take an old unwanted chair with a drop in seat and revamp it.  So I found a dark wood chair at a local auction, which I picked up for next to nothing in a job lot.

This sort of thing is a nice straight forward first upholstery project for anyone.  The drop in seat pops out, so it is easy to work on.  The seat was stripped back to the frame,  and the rest of the seat was rubbed down, then primed and covered in two coats of cream paint.

The seat was rewebbed and covered in a layer of hessian.  It was padded with layers of needled felt, then a layer of white felt.  It was then covered in calico, prior to the top fabric being put on.  The underside was then finished off with a layer of black bottom lining.

Finally the frame was distressed and rubbed with wax.  With the seat popped back in, I’m sure you’ll agree that this unwanted chair has now been given a lease of new life with it’s Cath Kidston fabric and would look lovely in any childs bedroom.
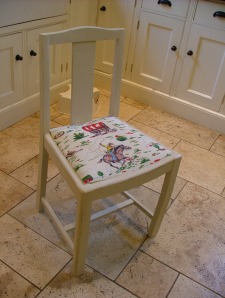
Chair in Cath Kidston fabric